
Tiled to AGK: Step 1-Prepare the tilesets.
It has been a long time since I have done a proper blog post. This one is the first part of a multi part series of importing Tiled maps to AGK. I use AGK in Tier 2 as a game framework using C++. This is the real draw to AGK for my use, as I have the simplicity of AGK with the power of C++. However, this tutorial is written using an AGK Tier 1 snippet as there is no need for any added complexity. I will eventually write a C++ variation that is more flexible, but none the less, let’s start part 1 of this tutorial. It is important to note that this does not only work with Tiled, it can be used to load any tileset/atlas image easily, but Tiled is my motivation for making it.

Tiled is an open source tile map editor for use in any engine. I will be making maps using Tiled and bringing them into my AGK Tier 2 project. The first step to doing this is to import the tileset images individually using the same ID’s that Tiled does. If you select a tile in Tiled, the ID in the property menu is always 1 lower than it’s exported ID. This makes ID 0 equal 1, ID 2 equal 3, etc… What this means is that the top left sprite ID = 1 and counts up going from top left flowing to the right then down. Something like this:
1  2  3  4
5  6  7  8
9  10 11 12
13 14 15 16
Using this code snippet, there are 4 variables of interest to turn all uniform tilesets into an AGK compliant file.
002 tileWidth = 128003 tileHeight = tileWidth004 numHorizontalTiles = 16005 numVerticalTiles = 16- tileWidth — Change this to the width of a tile.
- tileHeight — If the tiles are square, leave as is. Otherwise, set to the height of the tile.
- numHorizontalTiles — How many tiles are from left to right.
- numVerticalTiles — How many tiles are from up to down.
From there, just run the script and a file will appear in C:/Users/<<UserName>>/AppData/Local/AGKApps/<<AppName>>/media/myfile
Copy this file to the same directory your tileset is and rename it to “<<TilesetName>> subimages.txt” and you will be able to load the tiles in just fine.
Just to prove it works, I will demonstrate loading the tileset in AGK Tier 2.
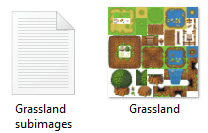
Tileset and Subimage file side-by-side
Once the generated file and tileset image are both in the same directory, you can then proceed to load the image and subimages to AGK. I included a very simple example code of loading in all 256 images (in my case).
std::list<g::Sprite*> s;
...
unsigned int image = agk::LoadImage("media\\Tilesets\\Grassland\\Grassland.png");
for (int i = 1; i < 256; i++)
{
	s.push_front(new g::Sprite(agk::LoadSubImage(image, std::to_string(i).c_str())));
	agk::SetSpritePosition(s.front()->GetSpriteID(), (i-1)%16*128, (i-1)/16*128);
}
This code makes a list of a Sprite class that I made for my project and loads up all subimages of the tileset into the list and places them from left to right, top to bottom.

Tileset loaded and placed, one tile at a time. Link to tileset.
There we go. Tilesets and Atlases made and loaded into AGK far easier than slowly typing out the subimages file manually.
Part II in progress, I will link to it here when done.
-Maindric

Pingback: Code snippet for Tiled tilesets to AGK | Maindric's Blog