
How to – Limit event to facing direction
Part 1:
In this tutorial, we will be covering how to check direction checking. This first half will be covering pseudo methods and just theory, the second half will be implementing it into RPG Maker VX Ace.
This portion of the tutorial will be usable in any game making engine as it is all pseudo, and not limited to RPG Maker.
What we will be covering in this tutorial is how to make an event trigger only when facing a character, and rom a specific distance. Sound simple right? Well, let’s get started!
Now, let me show an image of what we are going to achieve.

As you can see, we have two characters in this scene. We have Bill, the dragon, and Sam, the player.
Bill is looking at Sam obviously, but how does he know he can see him? He doesn’t! That is our job, to tell Bill “Hey! Listen! Sam is right there!”
How are we going to achieve this? First off, we need to decide on how much of the map he can see, so let’s draw some lines.
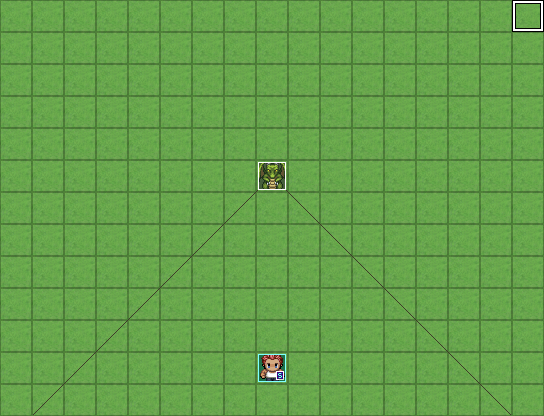
The lines I drew shows his line of sight. Basically, anything inside his line of sight, he can see. Obviously, Bill will not be able to see forever, so we need to decide how far his vision is going to go.
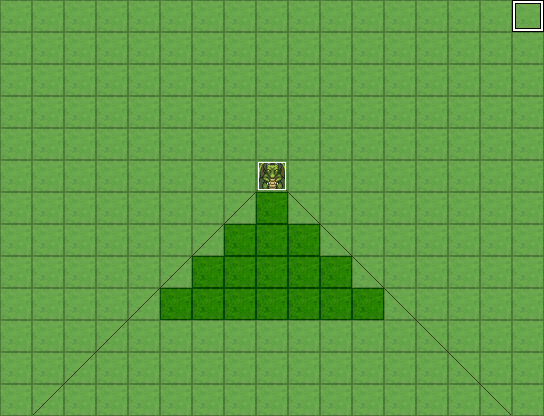
Here are some squares shaded in. The shaded squares tell us where he can see. Just for visual representation of that I mean, we have this:

Bill cannot see Sam!
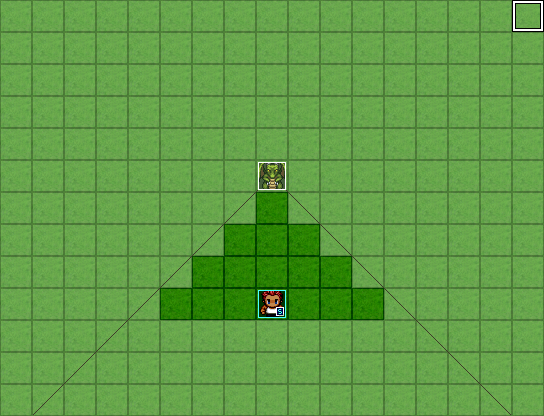
Bill can see Sam!
Now that we decided what Bill can and cannot see, let’s start with the math! First, we need the distance formula right? Well.. We could. However, I think it is more efficiently done a different way.
Time for the logic.
Alright, first thing is first, Bill cannot see behind him, so we need to rule that out.
If( Sam.Y < Bill.Y ) {
}
What that is going to do is ignore it if Sam is higher than Bill.
So, we removed all that, now, time to remove with guidance with the lines. This is harder to explain, so I will try to make it simple. The Y axis, him looking down, is the independent variable, and the X axis is the dependent variable. Basically, as Y gets larger, X gets larger, X cannot grow without Y.
Now, in RPG Maker VX Ace, the very top left of the MAP is (0,0), so the current values are based on that, we need to adjust it so we can run some local tests. To offset the positioning, all we need to do is take Sam’s values, and subtract Bill’s values, like so.
Sam.xLocal = Sam.xGlobal - Bill.xGlobal;
Sam.yLocal = Sam.yGlobal - Bill.yGlobal;
Now it is in local coordinates! In order to do any logical operators, we will need to take the absolute values of the local coordinates.
Sam.xLocal = abs(Sam.xLocal);
Sam.yLocal = abs(Sam.yLocal);
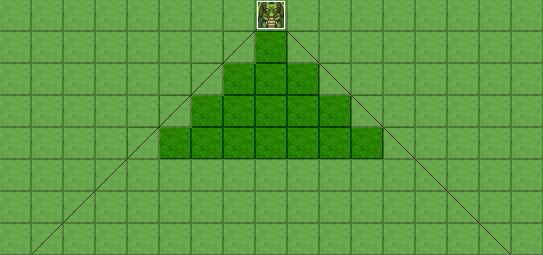
This is how that looks graphically:

So now we are dealing with half of it, but the other half is being checked as well.
Now, time for the logic!
If( Sam.xLocal < Sam.yLocal ) {
}
Now that I have show the logic, let’s condense it!
If we bring the absolute value into the local coordinate change, we get
Sam.xLocal = abs(Sam.xGlobal - Bill.xGlobal);
Sam.yLocal = abs(Sam.yGlobal - Bill.yGlobal);
We can even go a step further and combine that with the If statement and get rid of the variables!
If( abs(Sam.xGlobal - Bill.xGlobal) < abs(Sam.yGlobal - Bill.yGlobal) ) {

}
Mix this with the previous If statement, and we get this.
If( Sam.Y < Bill.Y ) {
   If( abs(Sam.xGlobal - Bill.xGlobal) < abs(Sam.yGlobal - Bill.yGlobal) ) {

   }
}
We lose a little bit of readability, but I feel we make up for it in efficiency.
Now, what did we actually just do? We are doing is checking to see if the character falls within the shaded area. I cannot find words to explain this well, so I will show in pictures!
Example number 1:

I not going to follow the pseudo code exact, so just take my word on the variables in this example.
Sam is at (0,-1) in relation to Bill. Now, -1 is in fact less than 0, which is Bill’s spot on Y, so we move into the If.
Now, let’s check to see if the player is in the line of sight.
The absolute values turn (0,-1) into (0,1). Then we check to see if 0 is < 1, which 0 is in fact smaller than 1.
And voila! It works!
Time for example number 2:

Sam is not in view, let’s verify with out code!
Sam’s local coordinates are (1,-1), and -1 is in fact lower than 0.
The absolute values are (1,1), however, 1 < 1 is NOT true, meaning he is not in view, so Bill CANNOT see Sam.
Ah, but wait, we forgot one thing, Bill can now see forever!
To fix that, just add this after the first If and before the other:
if( Sam.y - Bill.y > 5 ){
}
That is easy enough, all it is saying is if Sam is close enough, or in this case, closer than 5 square away, then he can be seen.
The final pseudo code:
If( Sam.Y < Bill.Y ) {    if( Sam.y - Bill.y > 5 ) {
      If( abs(Sam.xGlobal - Bill.xGlobal) < abs(Sam.yGlobal - Bill.yGlobal) ) {

      }
   }
}
Simple, right? That is it for part 1! Now, part 2!
Part 2:
Now we know how it works, let’s put it into RPG Maker VX Ace!
First off, I assume you have basic knowledge on manipulation of variables and conditional branches.
Second, I am only showing code for facing down, it will be easy enough from here to modify a few values and conditional branches for the other directions. Here is a rundown on the other directions:
- Up: Same as this, except check to see if player is above target
- Right: Switch around the X and Y’s dependency, basically instead of checking to see if player is below target, check to see if right, and so on.
- Left: Same as from down to up, but instead right to left.
Since I already explained the code, I will just show how it works with the eventing system.
First off, let’s go ahead and set all the needed variables.

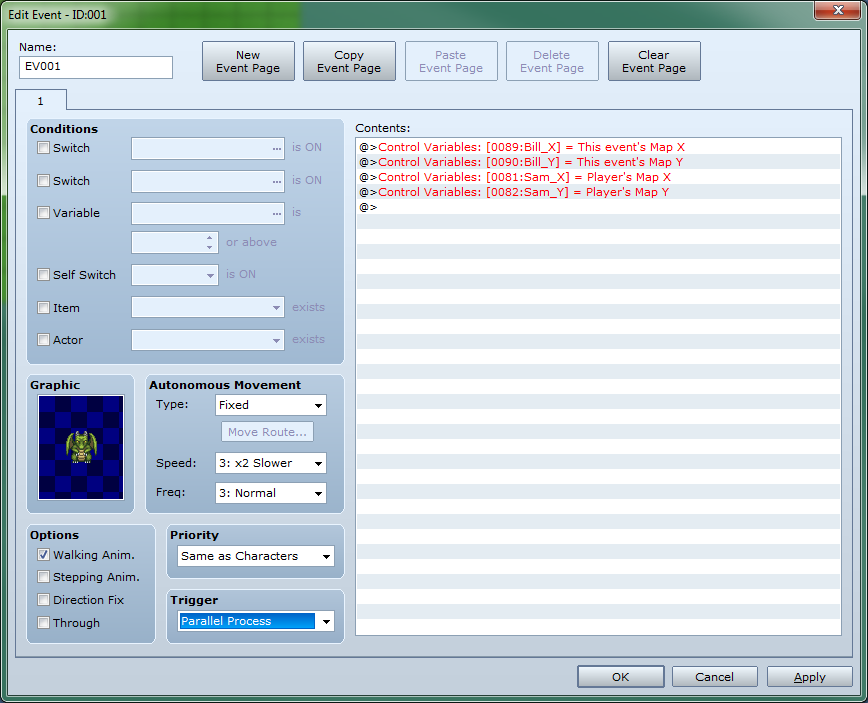
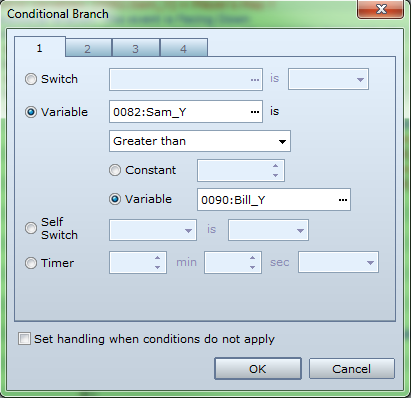
After we add the base variables, we will check the first conditions.
Keep in mind, in RPG Maker VX Ace, The top left is the origin, so to check if Sam is lower than Bill, Sam will have a higher Y value than Bill.
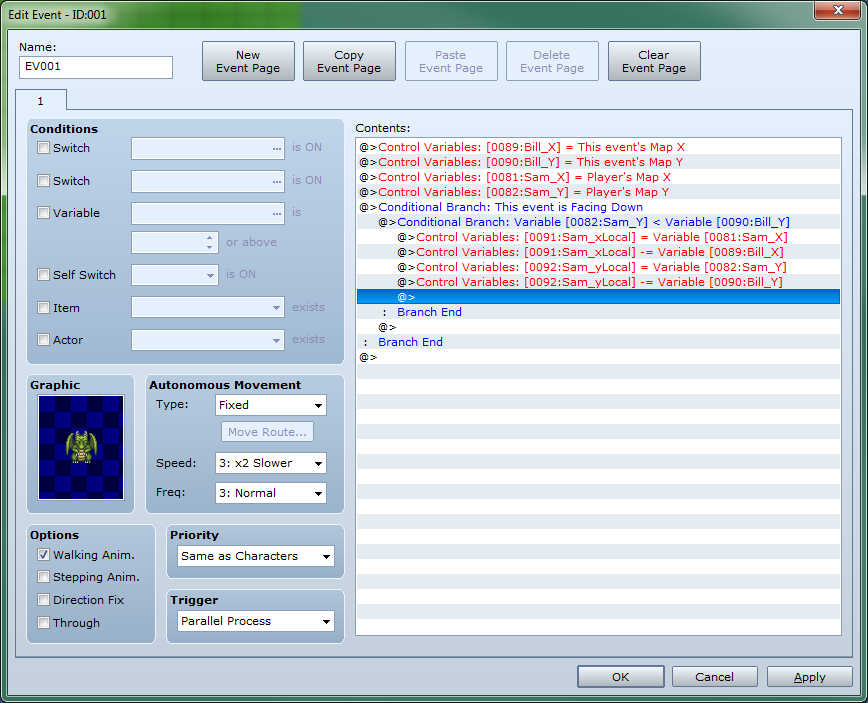
After the first if’s are taken care of, we can go ahead and assign the other variables.
Once we are done with that, we need to find the local coordinates, and then get the absolute values of them.
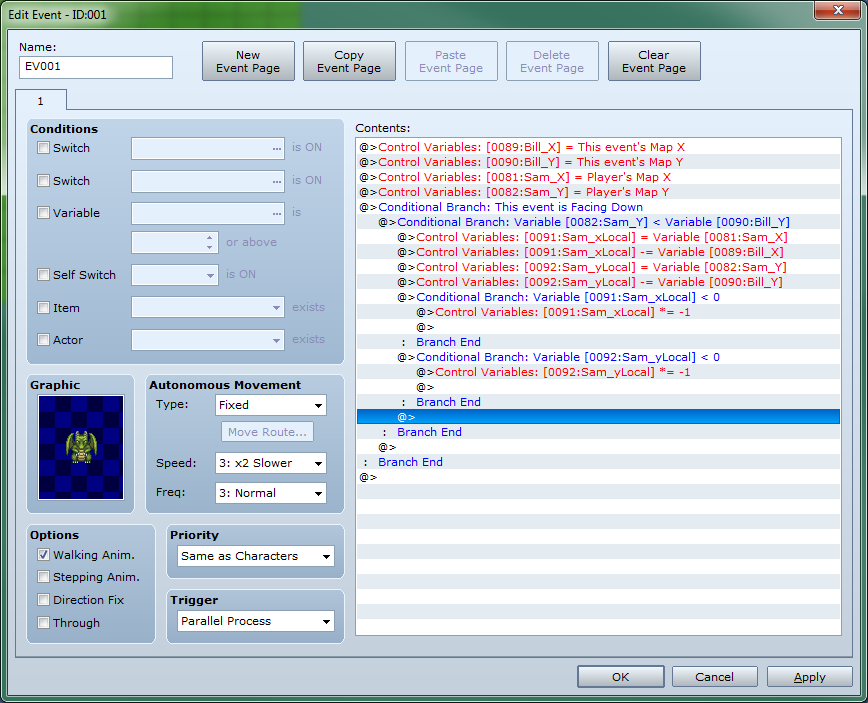
As RPG Maker VX Ace’s event system does not have an absolute value anywhere, we needed to make our own. If it is below zero, change it’s symbol, that simple.
Now, let’s finish it!

The text box and wait were only for testing, you can have it do whatever you want now that it is finished!
You can make it do a lot of things. What I am going to do with this is trigger a flag that makes Bill rush to Sam, and do battle, basically it’s mobs walking around looking to do combat with you.
I hope you all like this tutorial!

Leave a comment